
这周进行了一周的代码移植,将linux上的代码移植到Android中供JNI调用。起初觉得并不难,这段代码是用做多个平台的,里面定义了无数个编译开关,有用的没用的乱七八糟一大堆,我的头顿时大了起来。先是查make文件,找flags文件以及configure文件,从里面找编译编译时要使用的开关选项,然后打开一堆窗口,先是手动查找,接下来手动将不需
要的选项删除,狂删了几个小时,#if,#ifdef,#ifndef.....累得头晕目眩,最后把代码码在Android中用ndk-build来编译,下面是一般过程,和环境搭建,其部分内容参考网络内容。首先是网络环境搭建
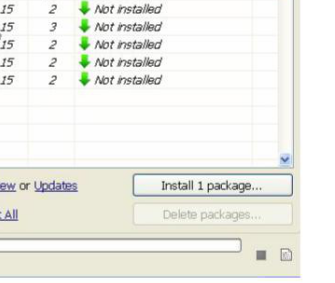
1下载androidSDK,根据系统的不同,选择不同的版本下载.下载之后,直接解压.运行SDKmanager,选择需要的API版本进行安装.
2下载NDK,根据操作系统的不同,下载不同的版本.Windows版本的下载之后,解压即可使用.
3下载ApacheAnt。
4安装JDK,下载地址从网上搜索就行了,之后需要通过我的电脑-属性-高级-环境变量,来新建一个JAVA_HOME的环境变量,指向JDK的目录,如下:

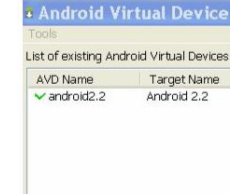
5运行AVDManager,创建一个虚拟的android,并点击start进行启动.
6在NDK的目录下,创建一个批处理文件android-cmd.bat,内容如下:
setPATH=%PATH%;%cd%;I:\android\apache-ant-1.8.3\bin;D:\DevelopTools\android-sdk\platform-t
ools;D:\DevelopTools\android-sdk\tools;D:\DevelopTools\JDK7\bin;
cmd.exe
从上面的内容可以看出,我的ant安装在I:\android\下面,android的sdk安装在D:\DevelopTools下面,JDK安装在D:\DevelopTools下面.
原因是,编译时需要用到ant/adb/android命令,所以需要将包含该命令的目录添加到该批处理的路径中.而ant需要JDK环境.
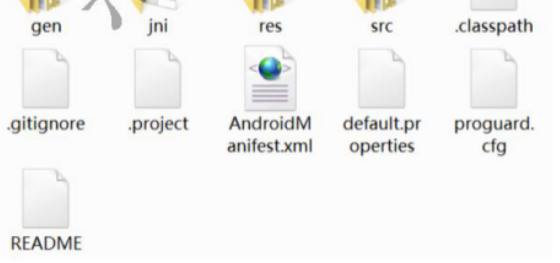
7运行android-cmd.bat,使用cd命令切换到samples/hello-jni目录下,运行androidupdateproject-p.-s,会生成build.xml文件,用于ant命令,要注意的是,编译的时候会发生错误,提示:
Error:Theprojecteitherhasnotargetsetorthetargetisinvalid.
Pleaseprovidea--targettotheandroid.batupdatecommand.
这个时候,可以使用androidlisttargets命令来查看当前系统中的android模拟器,我有两个,如下:
I:\android\android-ndk-r7c\samples\native-activityandroid.batlisttargets
AvailableAndroidtargets:
----------
id:1orandroid-8
Name:Android2.2
Type:Platform
APIlevel:8
Revision:1
Skins:HVGA,QVGA,WQVGA400,WQVGA432,WVGA800(default),WVGA854
ABIs:armeabi
----------
id:2orandroid-10
Name:Android2.3.3
Type:Platform
APIlevel:10
Revision:2
Skins:HVGA,QVGA,WQVGA400,WQVGA432,WVGA800(default),WVGA854
ABIs:armeabi
I:\android\android-ndk-r7c\samples\native-activityandroidupdateproject-p.-
tandroid-10-s
Updatedandrenameddefault.propertiestoproject.properties
Updatedlocal.properties
Noprojectnamespecified,usingActivitynameNativeActivity.
Ifyouwishtochangeit,editthefirstlineofbuild.xml.
AddedfileI:\android\android-ndk-r7c\samples\native-activity\build.xml
AddedfileI:\android\android-ndk-r7c\samples\native-activity\proguard.cfg
从上面看出,已经生成了build.xml文件了.
运行antdebug命令,输出如下:
I:\android\android-ndk-r7c\samples\hello-jniantdebug
Buildfile:I:\android\android-ndk-r7c\samples\hello-jni\build.xml
-set-mode-check:
-set-debug-files:
-set-debug-mode:
-debug-obfuscation-check:
-setup:
[echo]GatheringinfoforHelloJni...
[setup]AndroidSDKToolsRevision16
[setup]ProjectTarget:Android2.2
[setup]APIlevel:8
[setup]
[setup]------------------
[setup]Resolvinglibrarydependencies:
[setup]Nolibrarydependencies.
[setup]
[setup]------------------
[setup]
[setup]WARNING:AttributeminSdkVersioninAndroidManifest.xml(3)islower
thantheprojecttargetAPIlevel(8)
-build-setup:
[echo]Creatingoutputdirectoriesifneeded...
-pre-build:
-code-gen:
[echo]----------
[echo]Handlingaidlfiles...
[aidl]NoAIDLfilestocompile.
[echo]----------
[echo]HandlingRenderScriptfiles...
[renderscript]NoRenderScriptfilestocompile.
[echo]----------
[echo]HandlingResources...
[aapt]FoundDeletedTargetFile
[aapt]GeneratingresourceIDs...
-pre-compile:
-compile:
[javac]Compiling2sourcefilestoI:\android\android-ndk-r7c\samples\hello
-jni\bin\classes
-post-compile:
-obfuscate:
-dex:
[dex]ConvertingcompiledfilesandexternallibrariesintoI:\android\and
roid-ndk-r7c\samples\hello-jni\bin\classes.dex...
-crunch:
[crunch]CrunchingPNGFilesinsourcedir:I:\android\android-ndk-r7c\sample
s\hello-jni\res
[crunch]Todestinationdir:I:\android\android-ndk-r7c\samples\hello-jni\bin
\res
[crunch]Crunched0PNGfilestoupdatecache
-package-resources:
[aapt]Creatingfullresourcepackage...
[aapt]Warning:AndroidManifest.xmlalreadydefinesdebuggable(in网址/apk/res/android);usingexistingvalueinmanifest.
-package:
[apkbuilder]Currentbuildtypeisdifferentthanpreviousbuild:forcedapkbuil
derrun.
[apkbuilder]CreatingHelloJni-debug-unaligned.apkandsigningitwithadebugk
ey...
-do-debug:
[zipalign]Runningzipalignonfinalapk...
[echo]DebugPackage:I:\android\android-ndk-r7c\samples\hello-jni\bin\Hell
oJni-debug.apk
debug:
[propertyfile]Creatingnewpropertyfile:I:\android\android-ndk-r7c\samples\he
llo-jni\bin\build.prop
[propertyfile]Updatingpropertyfile:I:\android\android-ndk-r7c\samples\hello-
jni\bin\build.prop
[propertyfile]Updatingpropertyfile:I:\android\android-ndk-r7c\samples\hello-
jni\bin\build.prop
[propertyfile]Updatingpropertyfile:I:\android\android-ndk-r7c\samples\hello-
jni\bin\build.prop
BUILDSUCCESSFUL
Totaltime:5seconds
从上面,可以看出,生成了HelloJni-debug.apk,那么使用adb命令安装到当前的虚拟机上就可以
了.
运行adbinstallbin/HelloJni-debug.apk命令,如果出现:error:devicenotfound,说明你的android
模拟器尚未start.
运行后,出现如下提示:
185KB/s(85934bytesin0.453s)
pkg:/data/local/tmp/HelloJni-debug.apk
Success
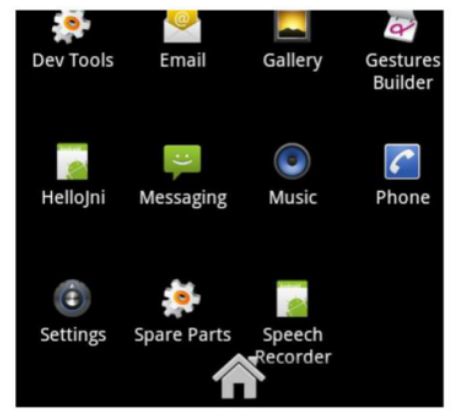
说明该apk,已经安装到android模拟器上了,单击模拟器上的主页按钮,可以看到HelloJni程序
已经生成了如下图所示
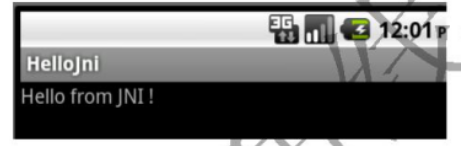
点击HelloJni,进入程序,可以看到:
现在对于基本的移植就可以了,下面针对一个linux下的arpspoof的代码进行移植编译简单过程如下将arp源代码复制到ndk的samples目录比如C:\android\android-ndk\android-ndk-r8b\samples
在目录中存在jni目录从cmd下进入后执行ndk-build编译c代码,成功后回到arp执行antdebug命令就可以生成apk安装文件了。